Showing posts with label recipes. Show all posts

Monday, 27 July 2026

Recipe corner: Duck breast with tomato harissa sauce

Whenever D goes away for the night, you can almost guarantee that my supper will consist of one of two things. Either pizza or filled pasta (tossed in butter, cheese and black pepper of course). Cooking for one person, even when that person is myself, has never been of particular interest to me which is daft really. But I am a bear of very simple brain and all I want, when I am on my own, is something delicious, easy and comforting. Maybe one day I will branch out but...maybe not.

Whenever I go away for the night, as I did recently, D comes into his own. A delicious meal, usually involving a large slab of protein, a bottle of fine wine - the man knows how to party solo. His latest creation was this very delicious looking duck dish that he has promised faithfully to cook for me soon.

He is rather obsessed, and with good reason, with his Meater probe as it guarantees perfectly cooked meat. If you don't have one then you will need to just go with testing and cook's instinct!


Ingredients

Handful of cherry tomatoes - halved
Generous splash of olive oil
Garlic cloves - finely sliced
Shallot - finely sliced
Tsp cumin seeds
2 tsp harissa paste

Duck breast
2 tsp harissa

To serve (optional) - frites, mayonnaise cut through with hot sauce

Serves 1

To cook the duck - first, preheat your oven to 180. Insert the probe and then place skin side down in a cold pan. Set to a medium heat (this will be a 5 or 6 on our induction hob). Cook for 10 minutes to allow the fat to start to render. As it sits in the pan, paint the flesh side with harissa paste. After 10 minutes, transfer to the oven and cook until it is blushingly pink (the timings will very much depend on your duck breast, and my notes from D just say - "Remove when the probe tells you to.") Brush the skin with harissa and set aside to rest.

For the sauce - heat the olive oil and then add the shallot and garlic, with a generous amount of seasoning, and allow to soften for a few minutes. Stir through the harissa paste, then add the tomatoes along with the cumin seeds. Use the back of a spoon to gently crush the tomatoes. Reduce, over a medium heat until the sauce has reached its desired consistency - at least ten minutes. Do a final seasoning check - you may need a touch more salt and pepper and even a pinch of sugar if the tomatoes aren't quite sweet enough.

Serve the duck atop the sauce - with optional fries and spicy mayonnaise on the side.

Wednesday, 10 February 2021

Recent eats: the interminable winter edition

I find myself so intensely boring at the moment that I haven't wanted to inflict any blogging on the world. Lockdown has not been good for me. I have basically turned even more sloth like in my habits and my hair is, frankly, ridiculous. Funky, asymmetric styles are all very well until they start growing out and then they just look like someone can't cut straight.

So we've been cooking and eating, which is fine. What can I tell you about? We brined a roast chicken the other week - or, to be strictly accurate, we brined a chicken for 48 hours prior to roasting it which was delicious. It would have been better, however, if I hadn't managed to roast it upside-down. Which meant that the underside was golden and crispy and buttery and the breast was...a wee bit pale and flabby looking. D removed the breast skin and crisped it up under the grill, while I languished on the sofa wondering how on Earth I have reached the age of 40 without knowing which way up a chicken should go. 

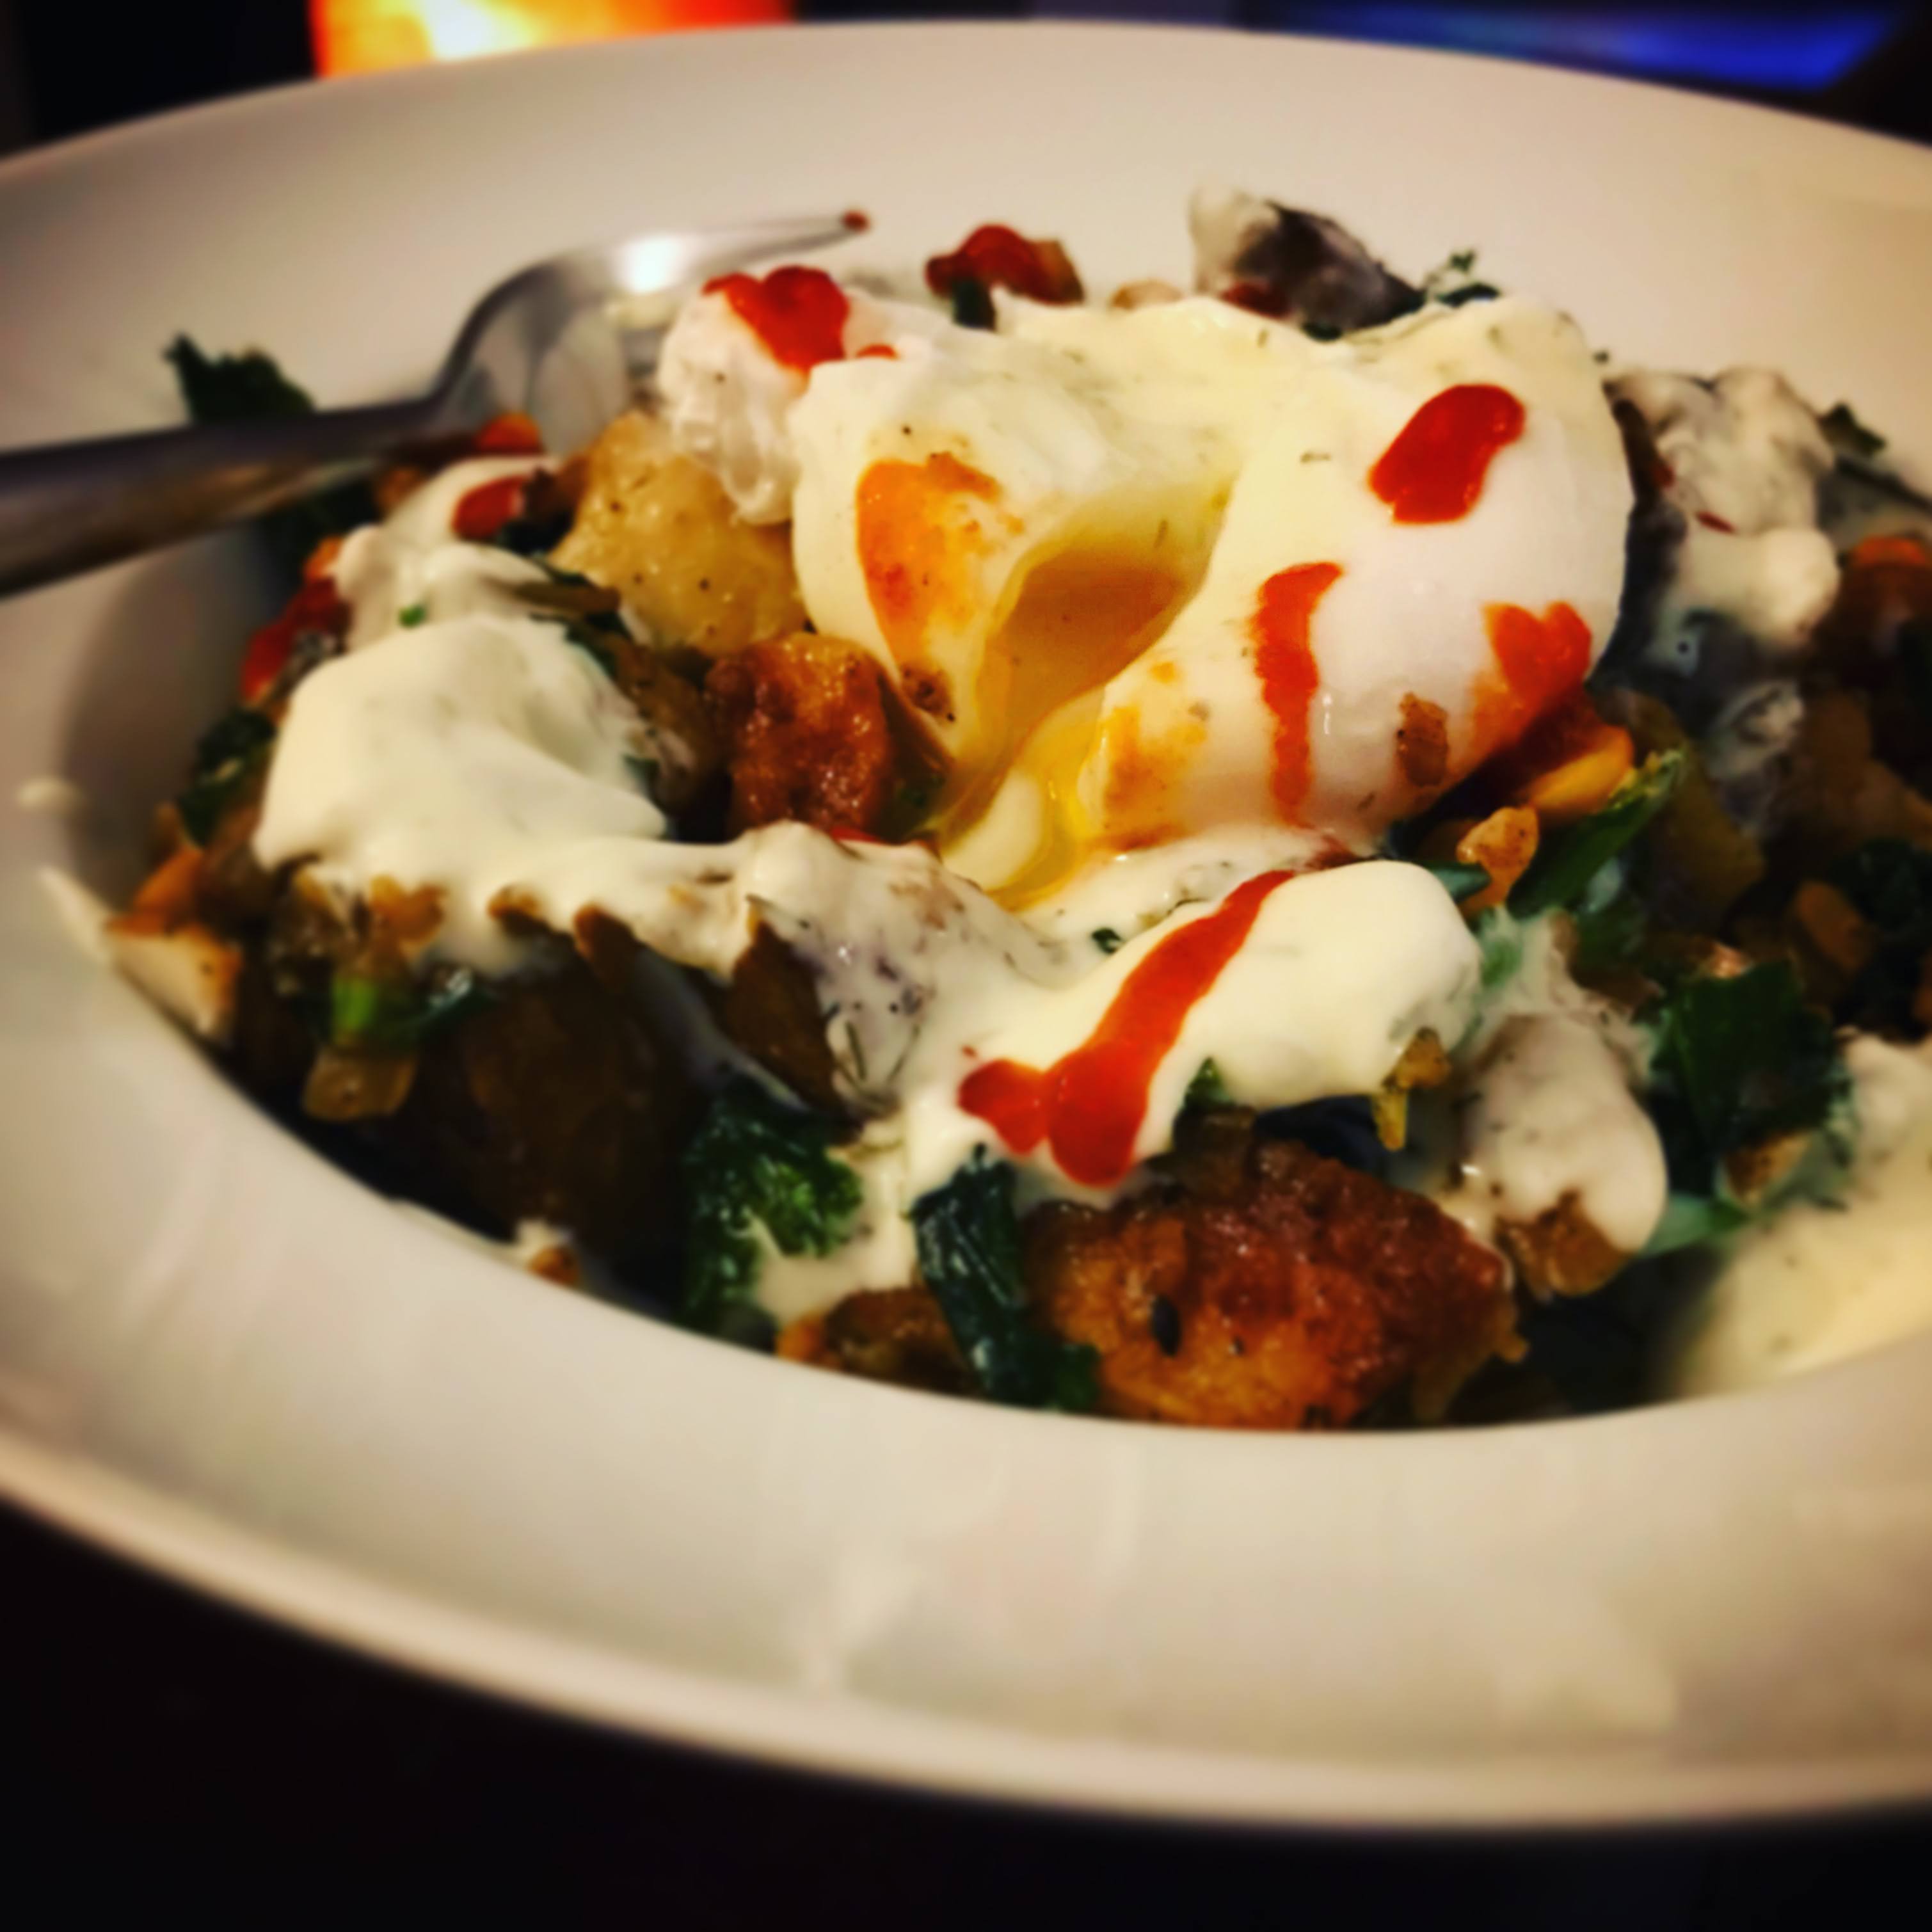
I made pizza last week, and remain very impressed with Dan Lepard's dough recipe, so that was good. We cooked a smoked haddock and kale hash from one of the new Christmas cookbooks which was DELICIOUS. It is actually online, here, if you're interested. It is one of those dishes that somehow manages to be significantly more than the sum of its parts. Highly recommended.


Oh, and D splashed out and treated us both to a Dishoom bacon naan takeaway kit thingy. Good, but we think we can tweak it to make it even better (it will probably include a liberal drizzle of our beloved coriander and chilli chutney, aka "green stuff").


In the background, we've both been trying to shift a bit of weight which I am loathe to talk about really because - see first paragraph it is SO BORING. And I'm conscious that this blog is like bloody Groundhog Day for Diets - except that it's not, not Bill Murray actually learns and grows during Groundhog Day and me...not so much. But I will say that a few months ago - mid-October time - we introduced low calorie days back into our week, so we now follow a programme of intermittent fasting which involves only eating for 8 hours a day and, on two of those days, only eating 500 calories. A mash-up of 16/8 and 5/2. And it does work, albeit slowly, and it is a hell of a lot easier to manage low calorie days when we're at home not really doing everything. Whether it will be sustainable when the world goes back to normal...not so sure. But since that shows no sign of happening for a while, we'll keep going for now! 

Tuesday, 5 January 2021

Happy New Lockdown

We watched that all time classic film Groundhog Day on NYE; it seemed peculiarly appropriate as we prepared to say farewell to 2021. And, turns out, peculiarly prescient too, as last night England was plunged back into the lockdown that everyone (apart, perhaps, from the actual government) knew was coming. And even though it won't make an awful lot of difference to my life in the immediate future (we had more or less decided to hunker down for the next few months anyway - and are blessed enough that we can do so) still, I lay awake for hours last night feeling sad and anxious.

I am worried for the health of my friends and family. I am worried for the sanity of those of them who have to go back to trying to home school their children alongside everything else. I am worried for all those businesses, particularly those in the hospitality trade, who must be limping along in hope of a miracle: what will survive when we finally make it out? I also realised, extremely selfishly, that I am worried about the food shortages that happened last time (who could forget that dreadful few days where I COULDN'T BUY EGGS*) and then started worrying about the fact that it is somewhat morally dubious to have such concerns in the face of all the others. 

*(And we get eggs delivered every week now, by our friendly local milkman, so we are usually overrun with them).

Let's talk of happier things, shall we? Did everyone manage to have some sort of Christmas? We were lucky enough to see my parents briefly on Christmas Day - I don't know how lucky they felt given that I wept all over them - which was gorgeous. I baked Gougeres for the first time in ages which almost made me feel like a hostess again. Christmas Dinner was our standard fare - confit duck leg, duck and black pudding bonbon, mash, red cabbage, creamy mustard sprouts - which, as ever, was sublime. And, for the first time ever I made a Yule log! I'd share a picture but, dear Teapot, my food photography skills, lacking at the best of times, have not been kind to the poor beast and I wouldn't want to put anyone in mind of...well, you know. Suffice to say, the sponge was light, the filling flavoured with cherries and Kirsch was airy and boozy and the chocolate ganache was dark and slightly bitter to balance everything out. I declare it a positive triumph.

Amazingly, our waist lines escaped the whole festive period relatively unscathed. We'd already been making efforts in that direction before Christmas (of which maybe more in a future post) and I think we naturally managed to balance the more indulgent days with lighter ones. My last hurrah meal before work re-started yesterday? A poached egg on toast. And very nice it was too.

A couple of recipes to share with you (I'll add the links to the relevant page). I used several different recipes for the Yule log, but the basic chocolate Swiss roll was from the GBBO site and I was extremely pleased with the way in which it turned out. Some recipes call for beating the eggs and sugar up over a pan of warm water, but warming the eggs slightly first is so much easier! My sponge was perfect after 8 minutes of cooking, but my oven is a beast so the 10 minutes specified in the recipe is probably fine for most. 

And this carrot and sesame seed bread by Dan Lepard (I'm getting slightly obsessed with the man) was divine - although I found that my mixture needed a splash more liquid than specified to completely come together. Marvellous flavour and texture in the finished loaf though - and a crisp crust that particularly suits it for toasting.

2021 may not have got off to the greatest of starts, but I hope everyone out there is bearing up. (Sort of ) happy new year all!

Wednesday, 23 December 2020

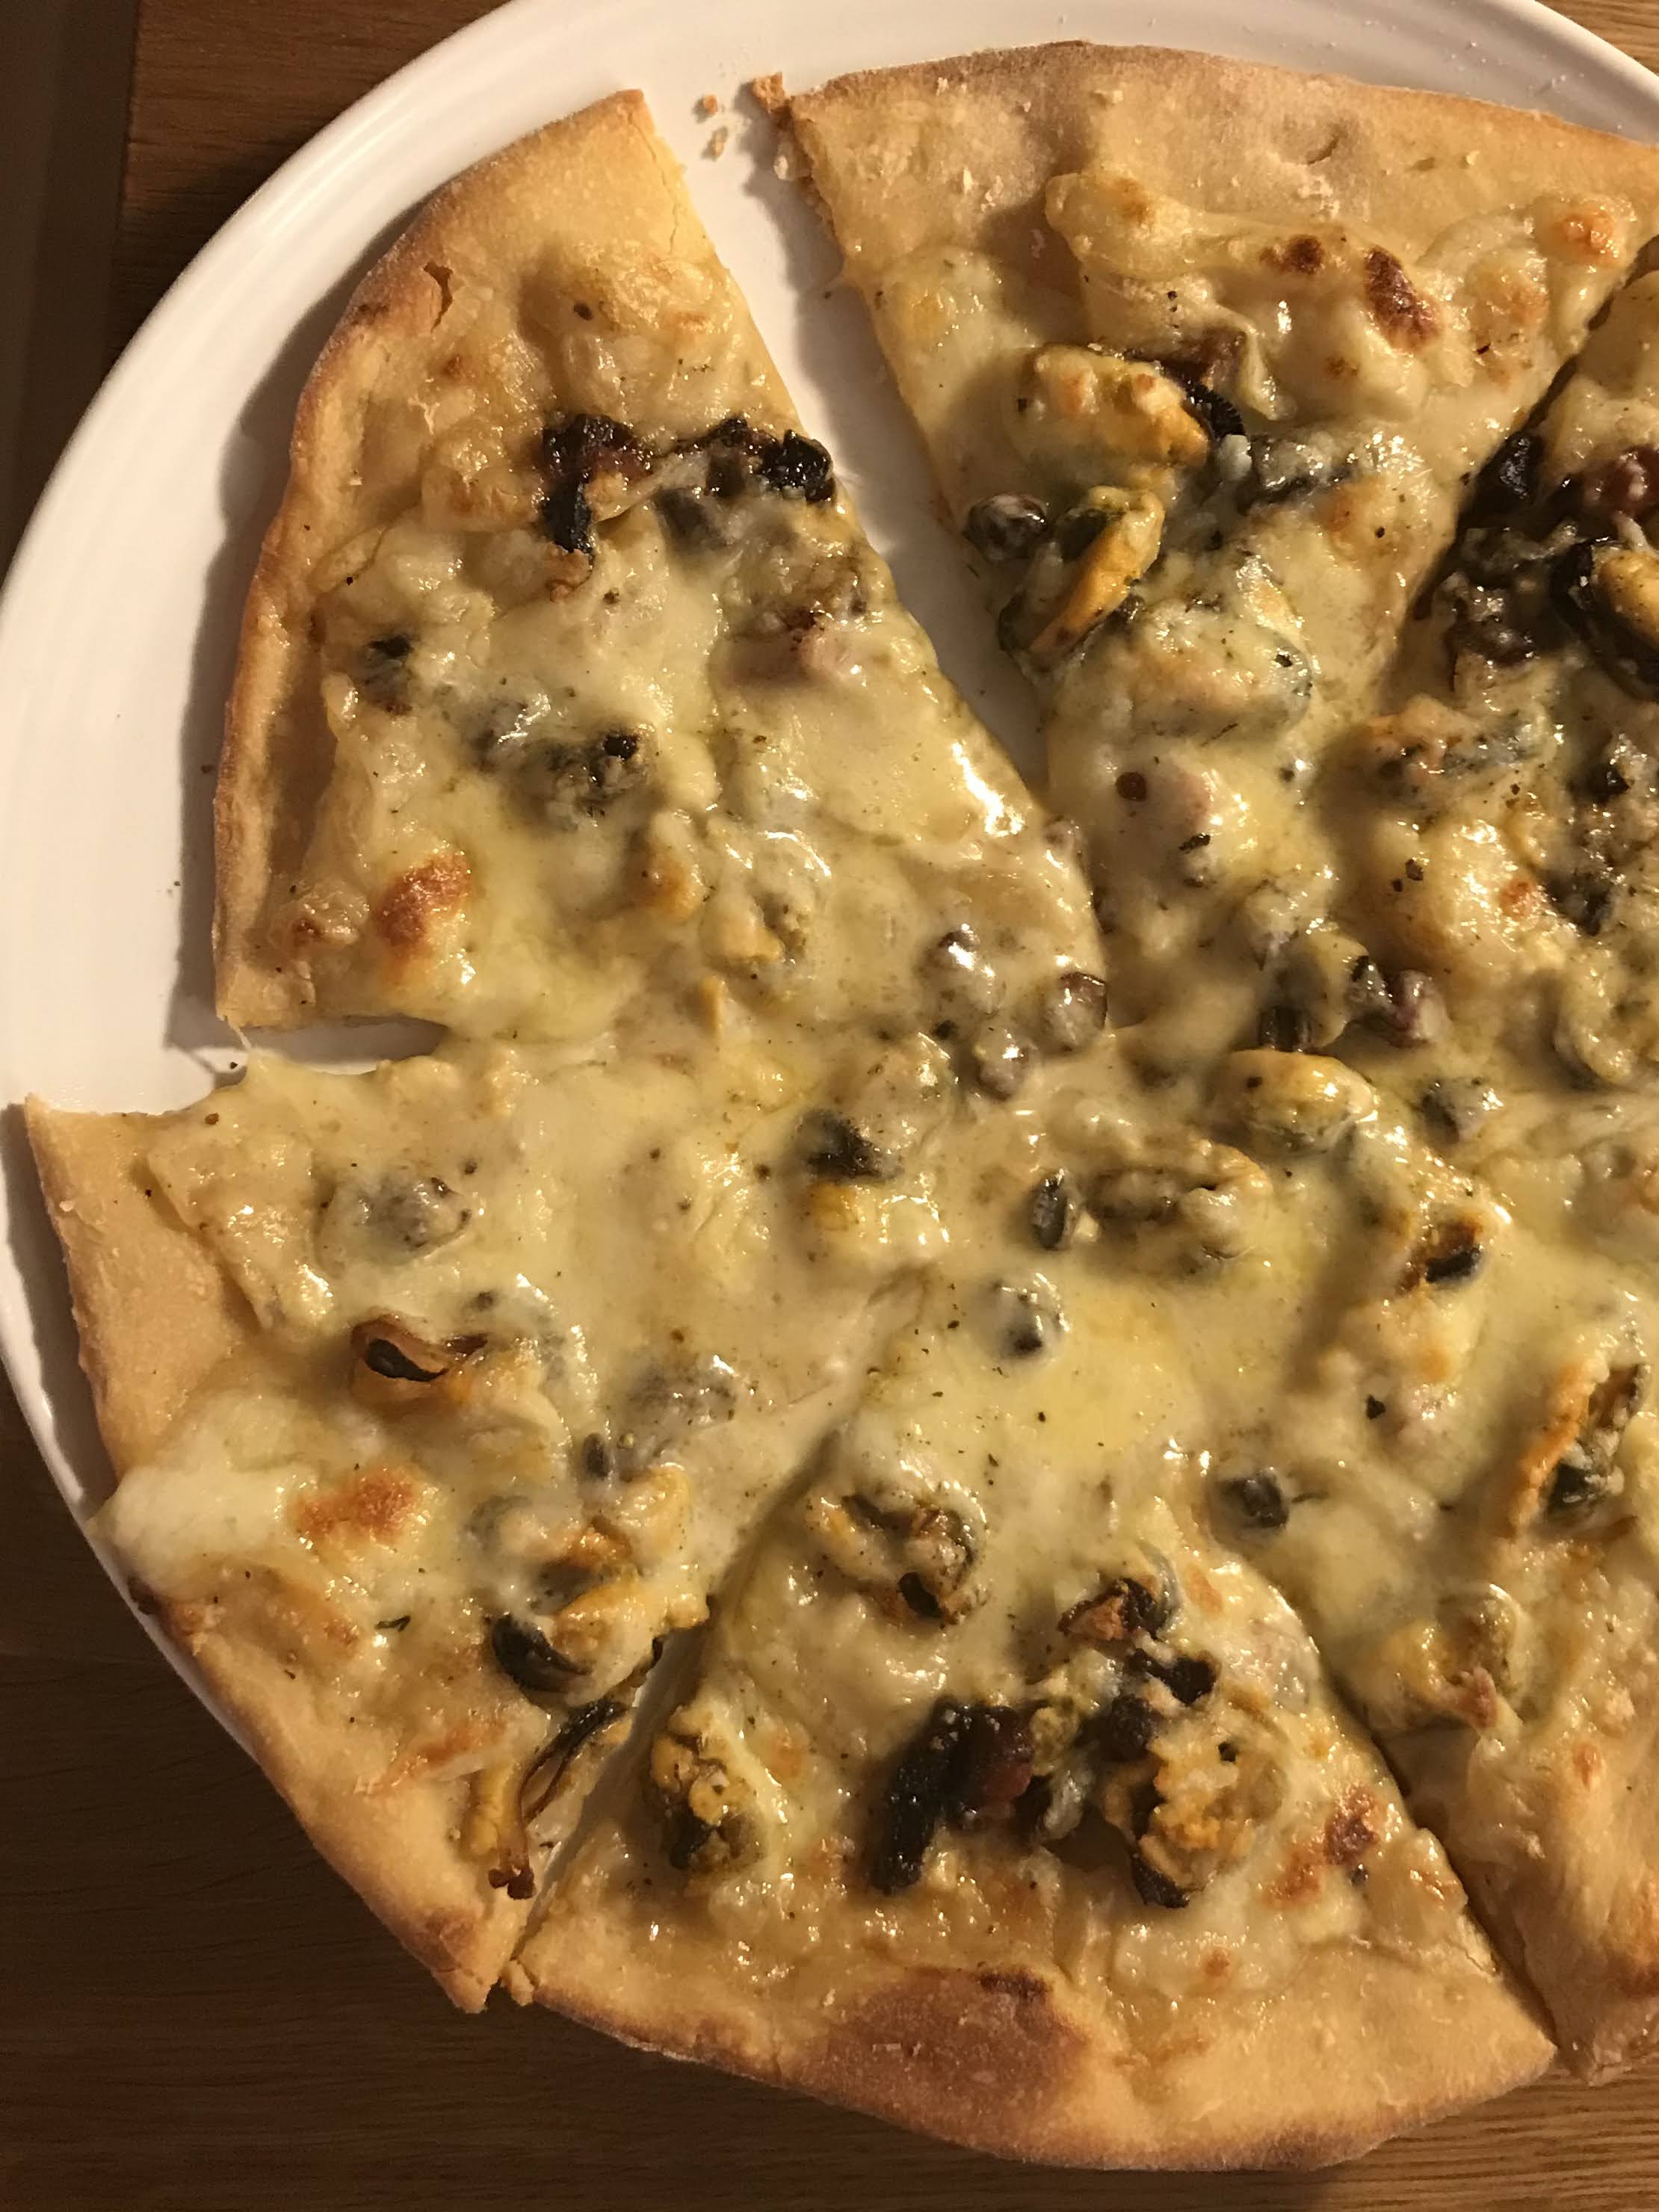
Recipe corner: Mussel and bacon pizza (jingle all the way!)

The thing about authentic Italian pizza is that tends to be pretty simple. Tomato, cheese and then a few, carefully chosen, toppings. Not enough of anything to create sloppiness: a crisp base and the structural integrity of the whole is important. No weird combos. No doughiness, no ten tonnes of cheese (that is the province of Domino's and their ilk). I get all that and I appreciate it. But SOMETIMES it is fun to play a little bit and end up with something which is somewhere between what an Italian Nonna would appreciate and what drunk people order at eleven pm with a side of chicken wings.


When I wrote this up in my notebook I called it "Pizza Bianca del mare e dell'odore" which means "A white pizza of the sea and the sty". And I like that title very much. It sounds so much more elegant than mussel and bacon pizza. But I've stuck with the English for the blog title because it's probably a bit more useful. 

This is a pizza that combines seafood and cheese, that is a little bit on the sloppy side and, to be honest, is a bit of a bloody faff if you're making it because it involves numerous processes. None of them difficult but it's not easy home cooking. Jamie couldn't squish it into a 30 minute meal. So I probably haven't sold it to 99.99% of the people who will come across this blog post. But for the rest of you, who are intrigued, you are in for a tremendous treat. I think this is the most delicious pizza that I've ever made.

When I wrote pizza 101 back in July 2016 (!) I was using Paul Hollywood's dough recipe, but I've fallen out of love with that recently after a couple of issues with the dough being just too sticky to practically use. So I turned to Dan Lepard and, sure enough, his recipe and method worked perfectly. I won't repeat it here but if you DO pop over to have a look I would note:

I used a tablespoon of malt extract and all water, rather than open some of D's precious beer

I went up to 200ml of water - 50ml fresh boiled and 150ml cold from the tap to get it luke(ish) warm.

I initially made the dough the night before using and left it in the fridge overnight before moving on to the stretching and folding stage. This has the benefit of spreading the effort a bit as well.

I was making personal sized pizzas, so divided this recipe into 6 (actually, I made a half batch and divided it into 3). This was a generous portion. If you're not greedy, you could reduce the portion size further.

And for the topping...

Ingredients

1/2 kilo mussels
Splash of white wine or Vermouth

150ml milk
3-4 garlic cloves, peeled and bruised
Large sprig of thyme
15g Parmesan
10g butter
10g flour

75g pancetta (or diced bacon)
Small onion, thinly sliced

100g firm mozzarella, grated
75g smoked cheese, grated

Makes 2 generous individual pizzas

OK, so firstly we want to cook the mussels with no more flavourings added than a splash of white wine. Clean and de-beard the crustacea then heat the wine in a large, lidded pan until it simmers madly, and tip them in. Cover the pan and cook for around 5 mins, shaking gently every so often. They'll be ready when the majority of the shells are yawning open. Incidentally: we tend to buy up bags of mussels whenever we make it the fishmonger, cook and freeze them for future use. But if you do this be sure to freeze them alongside their delicious liquor.

Make the white sauce by first infusing the milk with the garlic and the thyme. Place all together in a small pan, scald the milk (which means heating it until the edges are beginning to bubble) then turn off the heat, cover and leave alone for at least a couple of hours.

Then we make a roux - melt the butter, add the flour and stir briskly to make a paste. Pour in the infused milk, bit by bit, stirring vigorously every time to eliminate lumps. When you've added all the milk, add the mussel liquor - again, bit by bit. Gently bubble the sauce for a few minutes to ensure that all the flour is cooked out (the easiest way to check this is by tasting it - if you can taste even a hint of flour, cook for a bit longer) then season with the grated Parmesan, a tiny pinch of salt and a little pepper. This is the base of your pizza.

Fry off the pancetta until crispy and then remove from the pan with a slotted spoon. Then, turn the heat right down and soften the onion in the bacon fat.

Finally, assemble your pizza. Take your rolled out bases and spread across the white sauce. Top with the cooked mussels, bacon and onion and finish off with the mozzarella and smoked cheese. If you have any spare, sprinkle a few fresh thyme leaves over to finish. Bake in a very hot oven for about 12 minutes until everything is bubbling and beginning to brown. 

If you have any sense at all, you'll allow it to cool slightly (and, in doing so, begin to solidify) before eating.

Tuesday, 1 December 2020

Recipe corner: garlic butter naan breads

As mentioned in my previous post, I've been turning to Dan Lepard a lot lately for baking recipes. This one is an adaptation of a recipe for coconut garlic naan that can be found here. Although the original works perfectly well, I did not find that you got much of a taste of coconut from the coconut milk, so tried it out with plain yoghurt (which we more usually tend to have knocking around the kitchen) and was pleased with the resulting soft texture. I also advocate garlic butter rather than garlic oil for the dabbing-while-cooking but you need to be careful not to allow it [the butter] to burn.

Dan Lepard has a slightly different approach to bread making which generally means much less hands on time, and although it feels counterintuitive, it does actually work really well. You just need to make sure you're keeping track of where you are in the instructions!

I think that these, as with most flatbreads, are best straight out of the pan but the good news is that can you make the dough up in advance, divide it up into balls and then leave them, covered in the fridge for a good few hours with no ill effect. I finished the dough at 6pm on Saturday and cooked up the last naan bread at 12pm for lunch on Sunday and it still worked like a charm, if, perhaps, it puffed up ever so slightly less. However, since I was using it as a wrap, this wasn't an issue.

Ingredients

25g boiling water
75g cold tap water
4g fast-action yeast
185g plain, full fat yoghurt
275g strong white bread flour
Tsp salt

Oil, for the worktop
Additional flour, for shaping

25g butter
2 cloves of garlic, crushed or finely grated
A sprinkle of nigella seeds

Makes 3 large or 4 medium naan

Measure out the water into a large bowl (I've given weight rather than volume as I think this makes life a bit easier). Test it when the two waters are combined - it should be warm but not hot. Whisk in the yeast until dissolved and then whisk in the yoghurt.

Shower in the flour, add the salt and, using your hand shaped like a claw, bring the dough together - it will be soft and not too sticky. Cover the bowl and leave for 10 minutes.

Oil the worktop, tip out the dough and knead gently for 10 seconds. Return to the bowl, cover again and leave for 1 hour. Wipe up any remaining oil while you remember.

When you return to the dough, lightly flour the worktop then tip it out and divide into 3-4 pieces. Shape these into rough balls, cover, and leave these again for 30 minutes (at this point, you can transfer the dough to the fridge until you need it. Just be sure to bring up to room temperature before using).

Roll the dough out - the teardrop shape is traditional for naan, but round will work just as well here. 

Put a frying pan over a medium heat. Crush or grate the garlic over the butter and then melt (I use a microwave but a small pan and a low heat will do just as well).

Fry the breads for about a minute and a half, dabbing the melted butter onto the surface with a silicon brush, and finish with a sprinkle of the nigella seeds.

Thursday, 5 November 2020

Recipe corner: Carrot, apple and date muffins

Back when I used to work in an office (remember that time?) we had a Starbucks open just thirty seconds from the front door and, I must admit, initially the novelty factor was such that I was in there most mornings. And what better way to start the day with a milky coffee big enough to bath a kitten in, and a nice chunk of cake. For, let us be clear, we all know that the word muffin (in the non-English sense) is just a sneaky way to legitimise cake for breakfast.

I eventually managed to (more or less) ditch the Starbucks habit (although consumption used to creep up again around this time of year when the gingerbread lattes hit the store. I love a gingerbread latte, sickly as it is, and I love the announcement that the red cups are coming because - Christmas. But we won't go there yet). 

To return to the original thought - I eventually stopped the daily detour. And one of the things that helped break the habit is that they stopped doing two of the best muffins - apple and cinnamon and, for high days and holidays, "breakfast" muffins. I have only a limited idea what was in these latter but they were good - fruity and spicy with a sprinkle of seeds on top to indicate virtue.

I don't think these are quite the same, but they come pretty close. I don't generally eat breakfast much now - most of the time we do intermittent fasting to only eat between the hours of 12 and 8. (And yes, I realise that the first meal of the day is breakfast whatever time you choose to consume it, but I mean to say that I don't often eat breakfast type foods at noon.) However, a nice muffin is perfect with a cup of tea mid afternoon to get you through a sugar slump. This makes six decent sized muffins, but there is no reason why you could not miniaturise them if you felt so inclined. They contain some fruit and veg not to mention are partially made with wholemeal flour, so you can almost convince yourself that they're a health food - again, if you feel so inclined.

Ingredients

70g wholemeal flour
90g plain flour
1.5 tsp baking powder
Pinch of salt
1.5 tsp ground cinnamon
Tsp mixed spice
50g soft brown sugar
Eating apple, peeled, cored and chopped into small chunks
Carrot, peeled and coarsely grated
50g chopped dates

150ml milk (I always use skimmed which works fine)
1 egg
55g butter

3 tsp demerara sugar
3 tsp pumpkin seeds (or similar)

Makes 6 muffins

Preheat your oven to 200 (180) fan and prep a tray - I use a silicon muffin tray which I brush very lightly with vegetable oil, but you could use a metal tray with paper liners,

Combine all the dried ingredients (flours, baking powder, spices, sugar) in a large bowl. Add in the apple, carrot and dates and mix well so they are thoroughly coated.

In a small jug or similar, melt the butter (I do this in the microwave for ease). Whisk in the milk (which will immediately cool the butter) and then the egg.  Pour this into the dried ingredients and stir to combine.

Seasoned bakers will know - you want the ingredients to be only just mixed - don't overwork. I tend to use a spatula to fold the wet ingredients in, rather than stirring with a spoon, and I find this helps. Fold through four or five times until you can't see much by way of dried flour anymore.

Put the mixture in the cases (it will fit although they will be full) and sprinkle over the demerara sugar and the seeds. Bake in the oven for around 35 minutes until a skewer comes out clean (it may take slightly longer - my oven is a beast).

Serve for breakfast, lunch, dinner or snacks. Cake is good at all times of the day.

Tuesday, 29 September 2020

Recipe corner: my perfect Toad in the Hole

I'm finding it particularly difficult to edit Blogger posts at the moment which is most annoying and is what led to the original version of this post sitting in drafts for a couple of weeks before I ended up deleting it in disgust.  They have changed the layout which is supposed to make it easier to post from a phone or a tablet (it doesn't) and seemingly done away with the ability to poke around at the HTML version of the post which was what I used to do to de-wonk it when nothing else would work.  Or perhaps I'm missing something?  That seems quite likely. 

Anyway. Toad in the Hole. Isn't it a glorious concoction?  Plump sausages nestled in a cloud of golden batter - I can think of few things more comforting.  I mean, you could melt some cheese on top for that extra layer of indulgence (Diana Henry has a lovely, cheesy version in her book From the Oven to the Table which also features baby leeks) but here, we're going nice and simple and classic.

I've struggled with getting the Yorkshire Pudding element of my Toad right for years but recently saw Nigella making it on TV and she suggested using Jane Grigson's method which involves adding solids to liquids rather than the other way round and that seemed to work a treat. The result had a bit of crispiness at the edges but was wonderfully soft and gooey in the middle.  This may not be to everyone's taste - some people prefer their batter to be crisp throughout, in which case this may not be the recipe for you.

Notes:  there is no need to start the sausages off in the frying pan as I have suggested below - but it helps to give them a bit of colour.

In the (as usual somewhat crappy) picture, you will see that I have made the Toad in a rectangular Pyrex dish, but I have since tried it in a 20cm round silicon cake tin and this worked even better - no sticking of batter to silicon and, also, for some reason I feel it is more appropriate that this dish be round, although for the life of me I couldn't explain why.  

Side dishes - gravy is a must (and there is no shame in just making up some good old Bisto as far as I'm concerned) but then I think all you need is something along the lines of some roasted roots, perhaps some peas.  You could serve it with a scoop of mash, but I think it is unnecessary and I say that as a greedy person.


Ingredients

6 pork sausages - go simple and classic here
1/2 onion (red for preference) - thinly sliced
2-3 sprigs of thyme

2 eggs
160ml milk
125g plain flour
1/2 tsp mustard powder (optional)

2tbsp vegetable oil

Serves 2

First, make your batter - and you need to allow a bit of time for the liquids to stand, so factor that in.  Whisk together the eggs and milk and set aside for at least 15 minutes.  Then add the flour, mustard powder and seasoning and whisk again. Some people swear blind that batter needs to rest properly before using - I'll be honest, I've tried resting it for a good half hour and cooking with it straight away and didn't notice a great deal of difference.  Just be aware that you have some flexibility.

Incidentally, unless you're planning to have the batter sit around indefinitely, I would suggest pre-heating the oven at the point at which you add the solids - to 200 degrees - you want it to get nice and hot.

Put a tablespoon of oil in the dish you are using for the Toad and place in the oven for around 10-15 minutes.  Meanwhile, if you are cooking the sausages separately, heat the oil in a frying pan over a medium heat and cook them for 5-10 mins, turning regularly to get a decent colour on all sides (if not, just put all of of the oil and the sausages in at the beginning and start off in the oven).

Once the oil in the oven is hot, remove the dish, add the sausages and any oil remaining in the frying pan, and pour over the batter.  You need to work quickly here to make sure the batter hits the oil while it is still nice and hot.  Sprinkle the sliced onion and the thyme leaves over the top and return to the oven.

Bake for around 40 minutes by which time the pudding should be puffed and golden, just beginning to catch at the edges, and the sausages should be cooked through.  

Thursday, 18 June 2020

Recipe corner: 61-hour duck breast

I first became aware of the concept of brining meat for a short period when I saw Nigella, wearing some sort of silky dressing gown if I remember correctly, immersing a turkey in a bucket of salt water.  The overnight bath was said to improve both the flavour and texture of this sometimes maligned bird.  I have never done this myself (we don't tend to have turkey at Christmas) but I think my brother has.  Anyway, the point is, it is the first time that the concept of a short, sharp brine flickered on the radar, as opposed to the longer process that is undertaken for cured meats such as corned beef.

Short and sharp it may be, but it still has a massive impact on texture and flavour.  We had brined duck breast when we went to Restarant Joro in Sheffield and couldn't believe the difference it made.  And duck breast is good anyway so imagine doing something to it, relatively low effort, that makes it even better.  I would definitely urge you to try this.

You need to start preparing your duck 61 hours before you want to eat - hence the recipe title.  But be assured the amount of work you need to do is minimal so it requires more organisation than it does effort.

The flavours in our brine, and the subsequent rub, tend a little towards the Orient - so chosen to suit the accompaniments - but you could definitely switch this up a bit.  The ratio of salt and sugar to water is what is important here - D spent quite a lot of time researching brine solutions to ensure that he got this bit right.  

Ingredients

500ml water
75g salt
25g sugar
2 star anise
5 allspice berries
5 juniper berries
2 garlic cloves (unpeeled but bruised)
Bayleaf
Tbsp coriander seeds
Tbsp black peppercorns

1/2 teaspoon Chinese five spice
2 duck breasts (skin on)

Make the brine: but all the ingredients in a large pot, bring to the boil (stirring, if necessary, to ensure that the salt and sugar are fully dissolved) then allow to cool.

Place the duck in a suitable container (ideally one with a lid, otherwise you will need to make sure it is well covered with clingfilm or similar) and pour over the cooled brine.  Place the duck in the fridge for 48 hours.

Now (and this is important if you want a properly crisped skin), 13 hours before you intend to eat it, remove from the brine, dry with kitchen paper and place uncovered in the fridge.  This will dry out the meat.

1 hour before dinner, remove the duck from the fridge and allow to come to room temperature before cooking.

Rub a small amount - approx 1/4 tsp - of Chinese five spice in the flesh of the duck and then season both sides well with salt and pepper.

We have found that the best way to cook duck is to preheat the oven to 180 and then place it, skin side down in a cold pan over a medium heat.  As the duck begins to cook it will start to render its own fat.  The timings will depend somewhat on the size of your breasts and the heat of your hob, but after 5-7 minutes you should be able to see that the skin is getting golden and crispy.  Follow your instincts here - you want to get the skin perfect before putting it in the oven.

Flip the breast so it is now skin side up and place in the oven.  Again, the timings will massively depend on the thickness and the oven but here, there is no need for instinct - for a perfectly blushing pink duck breast you are aiming to get the internal temperature to 52.  If you don't have a meat probe then a) buy one and b) try giving it a prod after, again 5-7 minutes.  The texture should be nice and springy.

Serve with whatsoever you desire (but check out our anniversary dinner post for our most recent iteration).

Friday, 5 June 2020

Recipe corner: a basic template for houmous

It's been an up and down few weeks since I last posted.  In reality, very little has changed.  Our household (me, D, the cat) remain much as before the lockdown in the UK started lifting.  Because we are in the very fortunate position that we can both work full time from home, and have pretty much been able to get all shopping delivered throughout, we have decided to keep more or less to ourselves for the foreseeable.  Although the world has become very small, some days - most days - that feels OK.  I miss my extended family and I miss my work colleagues and I miss sitting in a bar with a pint and a packet of Scampi Fries, but the longer this goes on, the more "life before" takes on a certain dream-like quality.

But there are down moments.  I was broken by cake a couple of weeks ago.  It was good cake too - Nigella's Clementine Cake which is usually pretty foolproof but, on this occasion, because I was trying to deal with it alongside cooking something else, I rushed and it didn't come out of the tin properly; I ended up with half cake, half crumbs.  Such a small thing but I had a proper, screaming tantrum.  And then, for the next few days, found myself bursting into tears at random intervals.  To be clear, I don't think this was really about cake (and, in retrospect, it may have had a lot to do with hormones) but it made it obvious that I'm not 100% OK.  I don't think anyone in the world is 100% OK at the moment.  The fact that I'm OK an awful lot of the time puts me among the very, very luckiest of people.

Anyway, I post the below recipe more for my future reference than anything else - but if you are a houmous fan and have never made it yourself then I think it is well worth it if you happen to have a decent little food processor handy.  The secret to the perfectly whipped texture is, of course, the liquid that the chickpeas were cooked (or canned) in.  I came quite late to this realisation and had all but given up making it before I found out because I only ever produced an oily, claggy disappointment of a mess.  It's taken me a few goes to get the proportions quite right but I think that I'm there now - so I record it for posterity.  

This recipe produces, to my mind, the perfect basic houmous.  All the flavours are in harmony, nothing is too strident.  Once you have that you can play around with your flavours. I didn't weigh out exactly how much this produced, but in terms of volume was probably about the equivalent of the size of standard pot you buy in a supermarket.  Precise, eh?

Note: A true aficionado will probably:

a) remove the skin from the chickpeas before blitzing but, I'm going to be honest, I am not that person.  The results without removing the skin are perfect for my unrefined palate and

b) shudder in horror at the prospect of "flavoured" houmous.  But again, I am not that person.  Caramelised onion houmous is my particular favourite - and it goes beautifully with cheese.  So there.

Ingredients

50g dried chickpeas, soaked in cold water overnight
1/4 tsp bicarbonate of soda

1/2 fat clove of garlic, finely grated or crushed
3 tsp lemon juice
2 tsp tahini
Tsp sea salt (or, a generous pinch if you don't tend to measure such things)

NB: if you are using tinned chickpeas, this amount dried equates to about half a drained tin.  Simmer them gently in the can liquid for 10 mins or so to soften slightly and then proceed per the recipe.  Then buy some dried chickpeas and try it that way next time - you'll never go back!

This is barely a recipe but...

Drain the soaked chickpeas and then put them in a large saucepan, add enough water to cover them by about a centimetre, add the bicarb and bring to a boil over a medium heat.

Boil until soft - by which I mean it will crush easily, with minimal pressure, between your thumb and index finger.  The timings will depend on your chickpeas - I gave my last lot just half an hour, but it can take longer.  Keep the water topped up to roughly a centimetre or so over the pulses throughout and skim off any of the grungy looking foam that rises to the top.

When cooked - drain RESERVING THE COOKING WATER.

Put the chickpeas in a little processor - nothing else initially - and blend to a coarse paste.  You then want to add enough of the cooking water to create a perfect texture - and should do this gradually, a tablespoon at a time.  I have found that my optimum texture comes from between 5 and 7 tablespoons of liquid.  What I would suggest is take it down to ever-so-slightly too thick (for me, I would check at 3 or
4 tablespoons).  Then add the other ingredients so you can gauge what effect these have.  And only then finish adding enough water to get it to where you need it to be. Remember, it may vary as it is partly dependent on how much liquid the chickpeas have absorbed during soaking and cooking.

Now you have your basic houmous you can go mad!  Drizzle with olive oil and strew with pomegranate seeds!  Whack up the garlic!  Throw something entirely incongruous (like, say, caramelised onion chutney that needs using up) in there.  Have fun.  And eat smeared on pitta, or toast, or just with a spoon.

With love to all of you out there who are not quite OK.  Rather like the weather today, things remain changeable and sometimes rather gloomy, but the sun, always, inevitably, indubitably, comes out in the end.


Friday, 11 January 2019

Recipe corner: Sticky Toffee Parkin


A disadvantage of being born in the period between Christmas and the New Year is that a lot of nice restaurants are shut. I mean, it’s not a disadvantage for the people who work in them who are, I’m sure, very pleased to be able to spend time with their loved ones. But if you’re the kind of person who likes to push down the misery of growing older with copious quantities of delicious food and wine, then it can be a problem. So often, I ask poor old D to cook for me. Next year (which ends in a 9 which means it is not a big birthday but it is very nearly a big birthday and thus I am likely to be quite depressed) I’m just going to get takeaway pizza and a Colin the Caterpillar cake, I promise. But this year he delivered quite the triumph with his “Chicken Caesar Salad 2018”, pan fried seabass with lobster butter and, best of all, sticky toffee parkin.

This latter dessert is a reminder of all that is good and true in the world, even in these days of Brexit and Trump. It has all the spice of the traditional Yorkshire Parkin (my recipe for that is here) but slightly lighter of texture and, of course, DRENCHED in golden toffee sauce. You could have a bit of cream or ice cream alongside but, to be honest, you don’t need to do so. It is perfect as it is.

It should be noted that my husband cooks very big puddings indeed. The quantities that he provides as serving 3 could easily be stretched to 6 (in my humble opinion) if being made for people with normal appetites who are coming to the end of a substantial meal. Obviously, because it was my birthday I just engaged my Pudding Stomach and ate an entire one as described. But on your birthday it is OK to be greedy.

Right. Per the man himself:

Ingredients

75g self raising flour
40g oatflakes
5g ground ginger
1g ground nutmeg
1g mixed spice
3g baking powder
85g soft dark brown sugar


1 medium egg
28g butter

5g bicarbonate of soda
85g chopped dates
143g boiling water

Serves 3-6 depending on levels of greed

Oven at 180C.

Butter 3 metal rings - diameter 7cm and height 6cm, wrap tin foil round bottom quite tightly, the mixture is quite wet and will seep out otherwise. Butter the bottom of this too.

Put all the dry ingredients in your Kitchen Aid, using a K-whisk attachment, whisk ingredients until incorporated.

Add egg, and whisk until incorporated.

Add butter, in centimetre cubes and whisk until incorporated.

Add the boiling water to the dates. Add the bicarb. Mash the date mixture.

Add to the other ingredients and whisk until incorporated.

Pour into the rings, until about 1cm below the top.

Put in oven for about 25 minutes. Don't worry if the tops catch slightly as you will be cutting the tops off so they are flat.

Once they are done i.e. you can skewer them cleanly, leave to cool.

Make the sauce.

Ingredients

60g salted butter.
60g soft dark brown sugar.
50g double cream.

Put ingredients in a pan and bring to a boil. Turn off heat. Stir. Done.

Remove tops off the puddings (the puddings will rise about a centimetre or more above the height of the rings, which will make it easy to cut the tops off.)

Remove them from rings, using a knife round the sides.

NB: You could, at this point, divide each cylinder into two portions by cutting horizontally through the middle.

Put in a bowl.

Pour over the caramel sauce.

Eat.

Wednesday, 31 October 2018

Slow cooker recipe corner: Vivek Singh’s Suriani home-style chicken curry

A slow cooker curry recipe is perfect for this time of year and this one, adapted from the BBC Food site, is lovely. Please, please do not be put off by the amount of vinegar. When you first combine the ingredients it will taste and smell slightly overwhelming. By the end of cooking it will have mellowed to the most delicious subtle sourness.

From the BBC website

From me. A career in food photography clearly beckons...

The original recipe can be found here and comes with a sweet and sour coconut rice accompaniment but if you are looking to keep points down, you could just serve with plain rice. Or cauliflower rice. Or whatever you like really...I can imagine it with a chilli and coriander spiked mash.

This is a wet curry / stew, even if you reduce it as per the below suggestion. It’s got no thickening agent so it’s never going to be a thick sauce but I don’t think that is the idea. Just thought I’d mention it in case thinner curries aren’t your bag. You could quite easily bung a handful of lentils in it if you like - this wouldn’t affect the points. Oh, incidentally, you could also use reduced fat coconut milk which would take the points down to 5 per portion.

Ingredients

Tbsp rapeseed oil
2-3 large chicken breasts, cut into chunks

Half a punnet of chestnut mushrooms, sliced
2 red onions sliced

Can of coconut milk
Cinnamon stick
6 cloves
4 green cardamom pods
4 garlic cloves, sliced
5cm piece of ginger, grated
8 green chillies, slit lengthways
15 curry leaves
2 tsp salt
Tbsp black peppercorns, crushed
5 tbsp sherry vinegar

Tsp garam masala

Serves 4, 10 Smart Points (WW Flex) per portion

As ever, these slow cooker recipes are more of an assembly job.

Heat the oil and add the chicken pieces, in batches if necessary, to brown on all sides.

Meanwhile, put the coconut milk, the spices and the vinegar into the slow cooker. Stir well, then add the sliced veg and the browned chicken.

Lid on, cook on low for 8 - 10 hours.

We then used a slotted spoon to remove the meat and veg, poured the sauce into a pan and reduced over a low heat for 15 mins, but this is not essential if you’re looking for ease and speed.

Stir through the garam masala just before serving.

Wednesday, 22 August 2018

Recipe corner: Nando’s chicken pitta

I used to really like a cheeky Nando’s, even though admitting it may lead to the rescinding of my foodie credentials. And when I discovered what good points value it was under the new WW Flex system, I started jonesing for a chicken pitta. Unfortunately, said chicken pitta was 8 Smart Points worth of disappointment. So, I determined to make my own.

Now, Nando’s do sell a supermarket range of marinades and rubs so I could have just gone down that route which would have been an awful lot less faffing around. But I had an idea for a marinade in my head and really wanted to try it out. The results were extremely pleasing and, I think, worth a bit of effort.

I served the chicken pitta with spicy rice from this this recipe which was absolutely gorgeous and worked out at 5 Smart Points per serving (basically you only need to count the rice). I also made Macho Peas from this recipe which were also fabulous and 2 Smart Points per portion based on 10g of butter between two. You could reduce this if you so wished. It was one of the nicest meals that I’ve cooked for ages and I’ve been on form recently, so that is really saying something.


It’s a loooong list of ingredients, but most of this is standard store cupboard stuff.

Ingredients

2 large chicken breasts, cut into chunks

Red pepper, deseeded and cut into quarters
2 red chillies, deseeded and cut in half lengthwise

Tsp of rapeseed oil
Shallot, finely chopped
2 cloves of garlic, crushed
Tsp smoked paprika
Tsp dried oregano
Tsp ground coriander
Tsp ground cumin
1/2 tsp cayenne pepper

Tbsp tomato purée
2 tsp rapeseed oil
Tsp red wine vinegar

To serve:
2 medium pitta breads
10g mayonnaise
20g fat free natural yoghurt
50g half fat cheddar cheese, grated
Handful of lettuce leaves, shredded

Serves 2, 10 Smart Points per portion (WW Flex)

I would suggest putting the chicken on to marinade the night before.

To make the marinade, first, you need to set your grill to it’s highest heat and pop the pepper and chilli slices under there to blacken. When they’re good and singed, transfer to a bowl and cover with clingfilm. This will make it easy to slip the skins off a little later on.

Heat a teaspoon of oil over a low heat and sweat off the shallot for around 5 mins, until soft and translucent. Add the garlic and dried spices and cook off for a further couple of minutes until everything has lost its raw smell.

Remove the skin from the peppers and chillies and put the flesh into a small blender, along with the spiced shallots. Whizz to a coarse mix then add the additional oil, the vinegar and the purée and a good splash of water to help it all come together into a loose paste.

Take two tablespoons of the mix and combine it with the mayonnaise and yoghurt - set aside. Then add the chicken pieces to the remaining marinade, cover and leave for a few hours or overnight if possible.

When ready to serve, preheat the oven to 180. In a dry pan (the oil in the marinade should prevent any sticking) fry the chicken off for 2 minutes on each side. Then sprinkle over the cheese and transfer, covered, to the oven for a further 8-10 minutes to cook through.

Lightly toast and split the pitta then fill with the lettuce, the spiced mayonnaise and the cooked, cheesy chicken.

YUM.

Tuesday, 24 July 2018

Recipe corner: Red lentil, courgette and cheese loaf

I have never been the greatest advocate of yawningly “worthy” food so this recipe is something of a departure for me. Years ago, for reasons lost in the mists of time, D and I decided to detox the Carol Vorderman way and spent a very miserable week eating really bad food. I think that we managed about five days before falling face first into pizza. Ever since, anything like “lentil loaf” which sounds suspiciously like it has been plucked from the pages of a “clean eating” (bleurgh) book has made my toes curl a little bit. Nevertheless, I would commend this particular recipe to your attention because it is, quite simply, delicious. It makes me wonder if I should be a bit more open minded – after all, I’m quite a fan of spiralising vegetables as well – but then I remember back to Carol’s recipe for hummus, which resembled nothing so much as wallpaper paste, and I quickly change my mind.

Anyway, this loaf is utterly brilliant for anyone following the WW Flex programme because lentils and other pulses are now pointed at zero, which means that a slice of this makes a really low point, satisfying meal especially with a bit of salad and perhaps a cheeky hard-boiled egg (also zero point. Everything I eat at the moment, I serve with an egg on the side.) Last time I made it, D fried slices in butter and had them in a sandwich which, he reports, was most excellent. But frying things in butter and eating them with bread is (sadly) not the WW way unless one has run a half marathon and has oodles of points to spare. Behold the loaf in all its glory:


And here, in cross section, with the afore mentioned salad and egg (plus a drizzle of salad cream and another of sriracha). This entire lunch box was 3 Smart Points:


A note on reduced fat cheese. I love cheese. The notion of reduced fat cheese makes me slightly sad. Reduced fat products in general can be awful – and I utterly reject such aberrations as plasticky low fat spreads and “lite” mayonnaise. But I genuinely think for cooking, especially midweek, bog-standard cooking, a decent reduced fat Cheddar will do the job perfectly well in most cases. Pilgrims Choice is fine, as is Cathedral City – I need to try some supermarket own brands and if I come across anything particularly good, I will report back. If you are not counting points then feel free to use whatever cheese you like. A nutty Gruyere might work well with lentils. If you are counting, what I would suggest here (if you are so inclined) is to sub a proportion of the reduced fat Cheddar for a good smoked cheese as it will give the most wonderful flavour to the loaf. I used 50g of a very, very smoky (full fat) cheese and 75g of reduced fat Pilgrims Choice and it still worked out at 2 Smart Points per portion.

Ingredients

175g red lentils
Tsp vegetable Bouillon powder
350ml water
Courgette, grated
120g reduced fat Cheddar, grated
3-4 spring onions, chopped
Tbsp sriaracha (or other hot sauce)
Tsp dried chilli flakes
Squeeze of lemon juice
Egg, lightly beaten

Cuts into 8 decent slices, 2 Smart Points per slice (WW Flex)

Put the lentils in a large pan (big enough, eventually, for all the ingredients), stir through the stock powder and then pour over the water and set over a low heat. Bring the pan to a gentle simmer and then cover and cook for 10-15 mins until the lentils have absorbed the water and formed a thick paste. Mine cooked incredibly quickly and needed a splash more water after just 5 minutes, so it is worth checking regularly.

While the lentils cook, preheat the oven to 180, line a loaf tin (I always tend to use loaf tin liners such as these, but greaseproof paper would do as well) and prep the other ingredients.

Allow the lentils to cool very slightly and then stir all the other ingredients through and pour into the prepared tin. Bake for 45-50 mins until set firm and browning on top.

Wednesday, 6 June 2018

Recipe corner: Creamy salmon pasta

Everyone has a dish that they remember, perhaps from childhood or perhaps from a holiday, something that sticks out as being the absolute essence of Delicious. For D, it is a creamy salmon pasta dish that he once had while on a skiing holiday in Italy. He cannot explain what it was that made it so perfect, and, as with so many things, I suspect that it was partly a configuration of particular external circumstances that makes the memory so precious but, nevertheless, I wanted to have a creamy salmon pasta dish in the repertoire to please him.

The thing is, the majority of creamy salmon pasta dishes that I looked at are pretty much salmon, cream and pasta. Maybe a bit of white wine and/or lemon. There never seems to be much to them which I think makes them sound pretty bland.

Here, I’ve upped both the umami and the acidity. The shallots, Parmesan and, importantly, the anchovies, add a savoury note to the cream, while the wine and the lemony cooking dishes add much needed zing. I also really like the mustard here - not so much as to make its presence too obvious but just an underlying hum of warmth. Salmon, mustard and dill is a fantastic combination.

This is simple, quick to cook comfort food of the highest order. It may not quite live up to that one plate of pasta eaten by a young man in the Italian Alps, but the slightly older man who had it for his tea in a living room in Leeds seemed pretty content just the same.

Ingredients

1 large salmon fillet
Half a small lemon, thinly sliced
2 tbsp white wine

2 small or 1 large shallot, finely minced
Generous knob of butter
2 anchovies
50ml white wine
150ml double cream
30g Parmesan, finely grated
Scant tsp of English mustard
Generous tsp freeze dried dill

150g dried pasta

Serves 2, generously 

Preheat the oven to a 180. Put out a large square of tin foil and lay the lemon slices out in the centre of it. Season the salmon fillet well and then sit it, skin side down, on the lemon. Gather up the sides of the square foil, sprinkle over the wine and then bring the edges together to make a parcel. Bake in the oven for 15-20 mins (the timing will depend on the thickness of the fish) until the salmon is almost cooked through but still moist.

Once the salmon is cooked, the sauce can be prepared in the time it takes to do the pasta. So bring a pan of salted water to the boil and set a second, large pan over a low heat.

Tip the pasta into the water and set a ten minute timer.

Melt the butter in the other pan and, just as it starts to foam, bung in the shallot. It should be minced fine enough that it turns soft and translucent pretty quickly - 2-3 minutes. Add the anchovies and cook for a further couple of minutes until they have melted into the shallots.

Pour over the wine and turn up the heat. Reduce until practically all the liquid has disappeared and then pour in the cream, add the mustard and simmer for a couple more minutes. Reduce from the heat and stir through the Parmesan until melted completely.

To finish the sauce, flake through the cooked fish (discarding the soggy skin), ensuring that any fishy, lemony, winey juices also get poured in. Season with salt, pepper and dill.

Drain the pasta, reserving a little bit of cooking water. Stir through the sauce adding a splash or so of the water, if needed, to ensure a clinging texture (particularly pertinent if you prepare the sauce in advance).

Friday, 6 April 2018

Easter Sunday lunch

Although Christmas Day is generally the time where we push the boat out with regards lunch, we decided to put a little bit of time, trouble and thought into our Easter repast this year.  And, might I say, the results were very pleasing.


We wanted our starter to be nice and simple and, as luck would have it, we still had a packet of Tobermory smoked salmon in the freezer so elected to have that alongside some homemade bread.  It turned out, when said packet was retrieved, that the smoked salmon was actually smoked trout but we enjoyed it just the same.  It needed nothing more than a scrunch of black pepper and a few drops of lemon juice to make it perfect.  As for the bread, my love affair with Dan Lepard's sour cream loaf continues.  Such a good bread.  We ate the last of it yesterday (Thursday), lightly toasted, and it was still very delicious indeed.


For our main course, we wanted to try and recapture the glorious duck dish that we ate at Joro earlier this year.  The duck was brined for 48 hours and then served with a coriander and peanut pesto and a katsu sauce.  To make it more substantial than the original, we added a side of rice through which we stirred D's coriander and green chilli chutney.  This was utterly sublime, and I intend to blog the full recipe very soon so that I don't manage to forget exactly what we did.  If you happen to come to our house for dinner in the course of the next year, it is quite likely that this is what you will be served.


D gave up sweet stuff for Lent, bless his heart.  For six weeks he eschewed puddings, sweets, chocolate, biscuits and cake like a little trooper.  So I let him choose what he wanted for dessert on Easter Sunday, and his request was for a no-bake lemon cheesecake.  When I came to research this, I found that the majority of lemon cheesecake recipes were, in fact, baked.  But I came across this one by Mary Berry which seemed to fit the bill nicely.  It may seem a cheat to use lemon curd as a flavouring but the results were delicious and it was incredibly easy to do.  Instead of making one large cake, which served eight, I opted to half the recipe and make four cheesecake pots which makes life an awful lot easier in terms of serving.  My only criticism was that, for me, the ratio of base to topping was slightly off - the biscuit at the bottom is always my favourite part of a cheesecake.  So, if I make this again, I'd probably up the amount of crumb in the bottom of the pots by half.  Bear in mind though that I am greedy. 

We finished with cheese from The Cheeseboard in Harrogate.  If you ever happen to find yourself in Harrogate, and if you are a lover of cheese, then you must make them a visit.  The selection is amazing and they do nice bread and chutneys too (although obviously my bread is better!)

There may not have been a roast lamb in sight (I will remedy that shortly - one should never have to wait too long for a roast lamb dinner) but a very pleasing meal all the same and it was nice to mark the most important celebration in the liturgical year for all that I would no longer consider myself a practicing Catholic.  I hope that everyone out there on T'Internet, particularly those of the Christian persuasion, had a very happy and holy Easter.  The next stop is surely Spring!

Sunday, 1 April 2018

Recipe corner: D's green chilli and coriander salsa / chutney / sauce / thing

Hey! Long time no blog! I'd love to say it's because I've been out and about having adventures but other than going to work and getting ahead on my Goodreads challenge, I have accomplished very little.

I've been cooking - it's not that there has been nothing to say. We had a week of vegetarian meals, for example, which was great. I loved trying out some new recipes which included finally making Marcella Hazan's tomato butter sauce which I thought was DREAMY. And the kale salad that I served on the side was also a surprise hit.

We've also both developed something of an unholy passion for sriracha and are busily drizzling it on everything. Top tip - combine it with mayonnaise, Greek yoghurt, dill and a squoosh of lemon juice for the most fabulous burger sauce.

But today we're talking about another condiment which has taken up permanent residence in our fridge. This stuff is so good - stir it through rice, splodge it on cheese on toast or just eat it with a spoon, it's addictive. D just made his latest batch today and I got him to weigh out everything so that I could report it EXACTLY but, of course, as with any sauce of this type, you can tweak to your own individual tastes.


This keeps in the fridge for weeks. We run through it pretty quickly though.

Ingredients

150g green chillies
150g fresh coriander - stalks and all
25g shallot
25g garlic
90g vegetable oil
30g white wine vinegar
15g lemon juice
Salt and pepper to taste

Whizz all the ingredients up together and season well. The end.

Thursday, 7 December 2017

Recipe corner: A good, old-fashioned rabbit pie

D started a blog once.  It didn't last long, and only two posts were, er, posted.  The second one was his recipe for rabbit pie.  The fact of the blog means that I know that we have been making, and eating, this delightful dish for six years at the very least.  And yet I have never mentioned it here.  Mea culpa. 


Everything about this pie is delicious.  The suet crust, which crisps on top but remains fabulously pillowy underneath.  The delicate flavour of the rabbit in its lightly clinging sauce.  There will be those who wish to enter into a debate as to whether it should be called a pie when the pastry is only on top but I will leave them to it and merely tell you to ensure that you have a pile of buttery, peppery mashed potato ready to serve on the side. 


Note: the rabbit filling can also be prepared in the slow cooker.  We did ours on Low overnight and woke to a very savoury-scented kitchen.  I do think that slow cookers beat scented candles for making a house smell homely.  I would recommend reducing the amount of liquid slightly if you make this in the slow cooker (my general rule of thumb is to half the volume).

Ingredients

2 small rabbits, preferably wild, skinned and jointed
2 cooking apples, peeled, cored and chopped
2 white onions, chopped
275ml dry cider
425ml chicken stock
1 bay leaf
8 rashers of streaky bacon, diced

40g plain flour
40g butter
Nutmeg (for seasoning, along with salt and pepper)
Heaped tablespoon Dijon mustard
A generous handful of golden sultanas

350g self-raising flour
175g suet
200ml water
Milk, for brushing

Serves 6-8

At the bottom of a large pot, make a trivet out of the apples and onions, onto which you can place the rabbit and bacon pieces.  Pour over the cider and stock, throw in the bay leaf and a little seasoning and then bring the lot to a gentle simmer and cook for an hour, or until the rabbit is tender.  Set aside and leave to cool.

Carefully transfer the bacon to a pie dish using a slotted spoon.  Remove the rabbit meat from the bones, and add this to the dish as well (rabbit bones are small and sharp so this stage should be undertaken with a little care and attention).  Toss together the two meats, along with the sultanas, so everything is evenly distributed.

Strain the liquid remaining in the pot and set aside for sauce making (everything up to this stage can be done well in advance).

Now for the sauce - melt the butter in a large saucepan and then add the flour and combine to make a paste.  Gradually add the sieved rabbit and apple and onion stock, whisking well on each addition.  You may not need all of the liquid - you want the resultant sauce to be slightly thicker than double cream.  When you are there, season well with the nutmeg (about a quarter of a whole nut), salt and lots of pepper, and stir through the mustard.  Pour the sauce over the contents of the pie dish.

And now for the pastry.  Combine the flour and suet in a large bowl, alongside another generous heft of seasoning, and then gradually add water until it comes together to form an elastic dough. 

Generously flour a work surface and roll out the dough until it is slightly bigger in diameter than the pie dish.  Cut off a strip of dough, brush it lightly with milk and sit this around the edge of the pie dish.  The remaining pastry can then be draped across the top.  Brush the surface with milk, cut a steam hole in the centre and proceed to bake for around 30 minutes in a preheated, moderate oven.

Sunday, 19 November 2017

Recipe corner: tagliatelle with mussel butter sauce

For such a simple recipe, this looks bloody long when it's written out. Sorry. But if you like mussels, and pasta, and all good things, and if it pleases you to end a meal and have a glaze of butter about your lips then this is the dish for you.

I've already got a mussel pasta dish on here from years and years ago - I'll have to make it again soon to compare and contrast.


Ingredients

1kg fresh mussels (in their shells)
Small glass white wine

250g fresh tagliatelle

Tbsp olive oil
Shallot, finely chopped
3 cloves of garlic, crushed
Red chilli, deseeded and finely chopped
50g butter, cubed
Small handful fresh dill, chopped
Squeeze of lemon juice

Serves 2

Sort through the mussels, discarding any with broken shells. Remove the beards. Heat the wine in a large, lidded pan and when it just starts to simmer, tip in the mussels and cover. Cook for 5-6 minutes until the mussels are all steamed open, plump and glistening. Discard any that are closed and set the rest aside to cool slightly.

When no longer too hot to handle, remove the mussels from the shells and strain the winey juices. All this can, of course, be done in advance.

Bring a pan of salted water to the boil and, on a second ring, place a second pan (large enough to accommodate all the pasta) over a low heat and measure in the oil to warm.

Sweat off the shallot, garlic and chilli with a generous pinch of salt, then pour over the mussel juices. Reduce the liquid down by about a third. Start to add the butter a cube at a time, stirring well. Once all the butter has been incorporated you can throw in the mussels and dill.

Put the pasta in the now boiling salted water and cook for 3-4 minutes or per the packet instructions. Meanwhile, taste the sauce - season and add a splash of lemon to lift it slightly. It may taste slightly salty at this point but this will balance out when eaten with the pasta.

Toss the tagliatelle through the mussel butter sauce and serve immediately.

Wednesday, 13 September 2017

Recipe corner: Spiced blue cheese biscuits

Well, posting every day didn't work out so well but at least I've managed more posts in September than in August.  I will mutter something vague about progress and leave it at that.

I would have put up a meal planning post on Monday, but that fell by the wayside slightly because poor old D was under the weather.  He spent most of Sunday on his sickbed, looking impressively pale, occasionally rousing himself to make...um, emphatic deposits in the bathroom bin.

It should be added that, when not (insert appropriate euphemism here), he was far more stoic than I was about the whole thing.  Bad enough that I am a hopeless, needy invalid but it turns out that I'm also not much cop as a nurse!  Sigh.  Anyway, he seems fine now but we have been playing food by ear while his system (ridden with bugs) and my system (ridden with vomit-related anxiety) settle down.

Anyway, enough of bodily functions - let's talk canapes.  Because, you know, we are coming in to that season when the more sociable among us might be having parties - of the cocktail or dinner variety - and every good party thrower needs a couple of good canape recipes up their glittery sleeves.  My absolute go-to are gougeres, which recipe I shared here (and commend to your attention again).  But these, which I only baked up in an attempt to make some use of a rather decrepit piece of blue cheese, are really rather good indeed.  The dough, once made and formed into a cling filmed sausage, can be kept in the fridge for a day or too or even frozen.  I imagine that baking from frozen would work perfectly well, just add a couple of minutes onto the cooking time and apply common sense and vigilance.


The number of biscuits derived from this mix will obviously vary depending on how thinly you slice them - I got sixteen in total.

Ingredients

90g butter
150g plain flour
1/2 tsp baking powder
1/2 - 1 tsp cayenne pepper (to taste)
pinch of salt
1 egg
50 ml milk (I used skimmed to no obvious detriment)
100g blue cheese, grated

Have a large square of cling film ready to hand for when the mixture is made.

Lightly beat together the egg and the milk.

Now, rub the butter into the flour until it resembles (you've heard it before) breadcrumbs.  Or damp sand.  Mix through he baking powder, the cayenne and the salt until well combined.  Then add the cheese and again, mix well.

Now you want to add just enough of the egg and milk mix to bring the dough together.  Add a bit at  time and use your hands to mix it through.  As soon as the mixture begins to form a ball, cease and desist.  You will likely use about half - two thirds of the liquid.

Transfer the dough onto the sheet of cling film and, as if it were play dough or damp sand, roughly form it into a log shape.  Bring the cling film up and around and twist the ends, so that you have a sausage of dough.  Place in the fridge to firm up for at least half an hour.

If you're intending to make straightaway, preheat the oven to 170 and line a couple of baking sheets with baking paper.

Remove the dough-sausage and, using a sharp knife, cut into thin slices, placing each slice on the lined tray.  If you have the inclination, brush the top of the biscuits with the remainder of the egg and milk mix.

Bake in the oven for 15 to 20 minutes until golden.  Allow to briefly cool on a rack before serving (they are at their best a few minutes after they come out of the oven when they are warm and almost melting but not likely to take the roof off your mouth).

Tuesday, 5 September 2017

Recipe corner: Mackerel with giant couscous and roasted red pepper dressing

Blogging every day is going to be tough if I have many more days like today which consisted of hours of travelling on rattling tin can trains to get to a...challenging (to be diplomatic) meeting which I could have done without. I have nothing interesting to say and am exhausted and grumpy and fit for nothing but tea slurping. Fortunately, I found this recipe post lurking in my drafts folder. It's been a while since I made the dish but, having now been reminded of it, I'm very keen to get it into the meal plan as soon as possible.

I try and always carry a notebook with me when I'm out and about. Usually, it gets filled up with shopping lists and top 5s, the latter done in the pub when D and I are a couple of pints down so that the handwriting tends towards the illegible. Sometimes, though, I'll make a note of a thoroughly good combination of flavours, nicked from a menu or packet, and years later I'll get round to bringing them together in a dish.

Aside from anything else, making this reminded me of the grooviness that is giant couscous. So much more toothsome and satisfying than the regular stuff.

You could probably do away with the fish here if you wanted a light but flavour packed lunch; as part of a main meal, the sturdy mackerel more than stands up to all the robust flavours.

Ingredients

2 mackerel, filleted
Vegetable oil, for cooking (I favour rapeseed)
2 handfuls of rocket

1/2 red onion thinly sliced
50g golden sultanas
50g capers, lightly chopped
25g pine nuts
100g giant couscous
1L chicken stock

2 red peppers
Olive oil (extra virgin)
Balsamic vinegar
Runny honey
Clove of garlic, crushed

Serves 2

Heat the oven to 180. Quarter and deseed the peppers, season and roast in the oven until the flesh is soft and the skin black (20-30 mins). Transfer to a bowl, cover with cling film and set aside.

Meanwhile, sweat off the onion in a little oil until soft and beginning to colour. Transfer to a bowl and return the pan to the heat; lightly toast the pine nuts in any residual oil until lightly golden. Add to the onion, along with the capers, combine well, and set aside.

When the pepper is cool to the touch, peel off the blackened skin and transfer the flesh to a mini processor along the garlic, a slug of balsamic vinegar and a drizzle of honey. Blitz, and then trickle in olive oil until it forms a smooth dressing.

Bring the chicken stock to the boil in a large saucepan and then tip in the giant couscous and sultanas and boil for around 6 mins until the grains of couscous are tender. Combine with the onion and caper mix then cover to keep warm.

Heat a little oil in a large frying pan. Lay the mackerel fillets in skin size down, season the flesh and cook for 2 mins. Flip the fillets and remove from the heat, the fish will cook in the residual warmth.

Divide the couscous between two plates. Top with the mackerel fillets then a small handful of rocket and drizzle over the red pepper dressing.